Friday, 29 April 2016

How I turned my hair pink

Hi everyone,
As you may have seen over on my social media at the beginning of April, I coloured my hair pink. I have been blonde for a little while now and I have always wanted to dye my hair pink. So I finally got my blonde to that perfect blonde that you can put these types of colours on, and I just had to do it. Today I thought I would talk to you about how I went from my beautiful blonde to my perfect pastel. 
So lets get on with it.
My hair previous to dying pink


As you can see from the picture my hair was very blonde. I totally love this colour. Considering I have gone from dark red/plum to this amazing blonde, still blows my mind. Just so you know what is actually on my hair I use to have bleach highlights and then went onto a full head colour. So the ends and mid-lengths is bleach. Anything above this (where you can see the colour slightly darkens) is where I now have my roots done in a permanent blonde hair dye. The colour my hair was at this stage is the perfect colour to try out some funky colours, as the colour will grip well.
Applying the pink hair dye


 The colour I chose to use is the Bleach London Non-Permanent Hair Colour in the shade Rose. This is a stunning light/candy pink, which is exactly what I was looking for. I just have to add that when purchasing this colour I had only ever used one other colour from their range (Violet Skies) on a friends hair. Which I done a few scattered foils of. Also the girl I work with who kindly put it on for me had never used any colours from their range. Please let me add I know I sound like the typical hairdresser but please do a patch test of this colour 24h-48h before applying this colour.
To apply this you have to start by washing your hair, but do not condition it. Once you have done this just towel dry your hair. Next is the fun part so grab your gloves and get ready to apply the colour. We personally used a tint bowl and brush and worked through sections to ensure everywhere was covered evenly. But you can just apply it using your hands, just make sure you get everywhere. As you don't want that patchy look. We applied this colour as a full head colour on the scalp. Then we left it to take, they say to leave it for 15 minute. Personally we left it for 20 minutes.

   
 As you can see when the colour is first applied it is an amazing bright pink. Then the more it develops the brighter it gets. But don't worry the colour wont stay like this. Just so you know we applied one bottle to my head and that covered everywhere evenly. Once the time was up we went and washed it off with warm water. We then followed with conditioner. Do not shampoo. Lastly we just dry it off.
Hair after application of pink


 I absolutely love this colour and the longer I have it the more I don't want to lose it. As you can see this colour is not really bright but it is the perfect pastel. The amount of compliments I have received from clients is crazy, as I thought they would find it strange. This colour really picked up in places where my hair is super porous, and was less pink where it wasn't. But the result it gave me was perfect. I know this will sound crazy as the colour is pink, but the finish was ultra natural. Where it blended in and out in place made this colour look even more effective.
Maintaining the pink colour
As you can see from the pictures above I purchased the Bleach London Rose Shampoo and Conditioner. Both of which are highly pigmented. To use the shampoo you need to wet your hair and then apply and leave for 2-3 minutes. Then for the conditioner, apply to the mid-lengths and ends and leave for 3-4 minutes. Both products should be used every time you wash your hair to maintain the colour. I know what you must be thinking, I am crazy to think this would work. But seriously they do, even my clients noticed the difference. They definitely intensify the colour amazingly. I could not recommend these more highly if you have pink hair, or just want a hint of pink.
 As you can see from the picture above the shampoo and conditioner really help to maintain and even out the colour.
I absolutely adore my perfect pastel hair and I look forward to having it redone next week. I seriously cant believe how long I managed to get it to last in my hair (1 month). I truly think this is down to the shampoo and conditioner. I hope that you enjoyed this post as much as I did creating it. Have you ever dyed your hair a crazy colour? If so, tweet me your picture so I can check them out. I would love to see them. What colour do you think I should go next? Let me know in the comments. If you would be interested in a blog post about my journey from red/plum to blonde, let me know in the comments.
Love
Zoe x
Share:

Thursday, 28 April 2016

How I store my products

Hi everyone,
Todays post is on how I store my products. Now let me just say I own a lot, yes I am aware of this. But please bare in mind all my products are purchased with my own money that I have worked extremely hard for. When it comes to storage I have to admit, I am quite fussy. I know how I want something to look, but it doesn't always go to plan. Currently I would say my storage is half there and half not. The same goes for my room. Since we moved I cant seem to get things perfect and I cant seem to find the things I want to make it perfect. But here is what I have done so far. If you have any suggestions for storage please leave them in the comments I would be so grateful.
My everyday kind of products:
 

For my everyday products I have this really cute wicker basket that I keep them in. This is the one piece of storage I love, it looks adorable sitting on my dressing table. In this basket I keep things I need to get to regularly. It includes hair products, beauty products, body sprays and perfumes and even my brush cleaner. What I love about this basket is it is really deep so you can fit so much in it. Next to my basket I just keep 3 Morphe palettes, as I am yet to find them a home. My Morphe brush set and other make up brushes that I keep in little glass jars. A glass jar that holds my cotton wool discs and then just two Marc Jacobs perfumes. I love this part of my dressing table as its nearly to how I want it, I know it might look a bit cluttered but its a work in progress.
My everyday skincare products:


I know what you must be thinking, this is a mess. I totally agree with you. Again this is my work in progress. I am currently on the hunt for something ultra cute to store my skincare products in. Either that or I am going to find a new home for them somewhere else on my dressing table. As these are quite literally used everyday I want to be able to store them nicely and within reach. As you see at the moment this little metal basket holds many products, which let me add are all used either everyday or once a week. I do own other skincare products which are also open, I have a bad habit of trying new products before I have used what I am already using. But I store these else where. I love that with this basket all my skin products are just there, I don't have to hunt around for them.
Wicker basket tower: 
 

This use to be my mums, she use to store her cds and dvds in it. Then one day she decided she didn't want it anymore so I had it. Technically this isn't actually needed in a way that the drawers are far too small and you can hardly store anything in it. But on the other hand, its storage and to me right now, that's all that matters. I don't plan on keeping this forever but for now it does the job. In the top drawer I store odd bits and bobs. Like razor heads, spare cotton buds, tweezers, facial sponges and other little odd spares I have. The second and third drawers hold spare products that are unopened. Be this beauty or hair. The bottom drawer hold small jars of Yankee Candles and just some tea lights. This at the moment is really handy but to fair it is not an essential piece of furniture for my room.
Dressing table storage and plastic storage unit:
This is the part of my dressing table I hate the most, I mean look at the state of it. I will give you just a quick idea of what I keep here. Lets start with the plastic storage unit. The top drawer keeps my hair electrical appliances, which I own tons of. Second drawer holds everything. From hair stuff to beauty stuff. The bottom drawer has beauty stuff in and a few unopened products. The drawer in my dressing table holds all my makeup, which seems to overflow every time I open it. The shelves hold everything from hair curlers to products to a facial steamer. I am hoping to get a new dressing table at some point. As I don't have much room in my bedroom it is hard to find one I am happy with. I also need a ton of storage. If you know any dressing tables that you think I will like please leave me the link below, so I can check them out. I would love if you did. As messy as this looks, I actually can find everything. 
So this is my product storage in my bedroom. As you can see its getting there but is taking time. If you would be interested in seeing parts of my storage in more detail, let me know in the comments. I hope you enjoyed this post. What storage do you use in your room? Let me know in the comments. 
Love
 Zoe x
Share:

Sunday, 24 April 2016

My everyday make-up

Hi everyone,
Todays post is a little different. I thought I would do a post on my everyday make-up but by including a video. I am going to give you all the products I use in this post as well. This make-up look is very simple and quick to do. This is the look I wear pretty much everyday for work. Its perfect as it is barely there but there enough that you know your wearing it. I hope you like it. 


I would just like to say I know my blemishes are still visible through my make up. But I personally like to wear not a too higher coverage foundation as I have problems with my skin.

  
Products used:
Tools used:
So that's my everyday make-up. If you would like to see a going out make up tutorial. Let me know in the comments. Have you tried any of these product or have any you would recommend? Let me know. I hope you enjoyed this post as much as I did making it. Also what do you guys think of me doing YouTube, let me know in the comments. 
See you next week.
Love
Zoe x

Share:

Friday, 22 April 2016

My top 5 fake tans

Hi everyone,
Todays post is on something I absolutely adore, fake tan. Now I am no stranger to a bottle of fake tan. Nor am I no stranger to the fake tan aisle in Boots, which I must admit I probably visit once or twice a week. So I thought why not put my tanning knowledge to use. Trust me I have tons of it, I have had the highs and the lows of fake tanning experiences. This is going to be a post on my top 5 fake tans. Which trust me, all have excessive use, especially this time of the year.
1. St Tropez Self Tanning Bronzing Lotion
This tan is my number one holy grail tan. I know what you must be thinking, she exaggerating just a tad here. Well believe me when I say this, I'm not. This tan is beautiful. It applies incredibly well, blends stunningly and leaves you with a flawless tan. This one also smell amazing, it has not got that fake tan smell what so ever. I have been using this tan since I was back in high school, and I have just run out of it. I am currently working my way through my tans to use up any old ones before I repurchase any. But this one will be the first I go out and buy. If you are a regular fake tanner, you need to go check out the St Tropez range of tans. You wont regret it.  


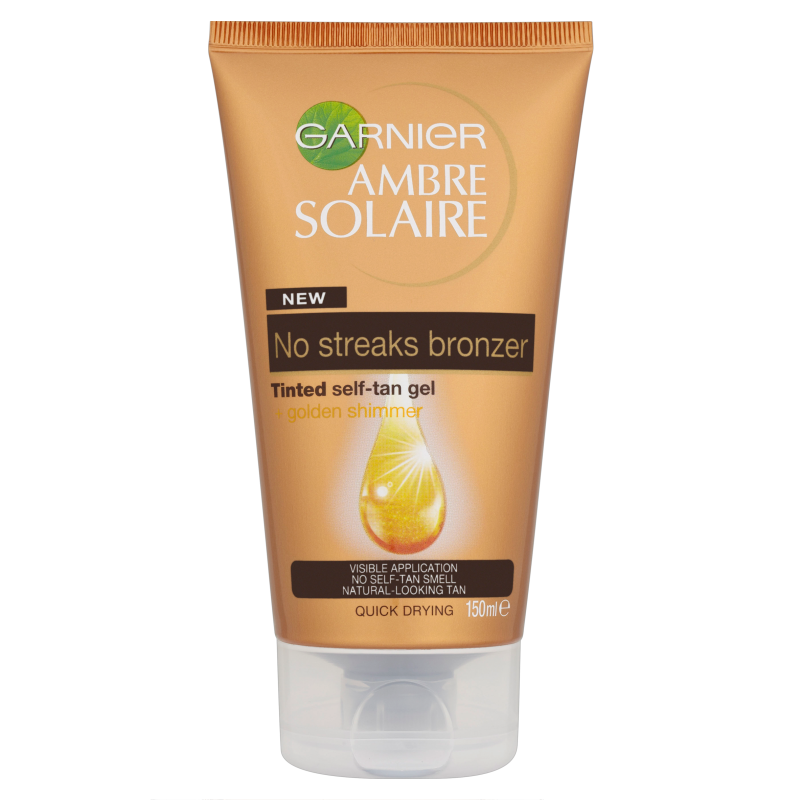
2. Garnier Ambre Solaire Tinted Self Tan Gel
Wow what can I say about this tan. I purchased this a long time ago and it was my most used tan back then. As my tan collection started to grow, I grew further and further away from this tan. Recently I started using it again, and it reminded me why I feel in love with all that time ago. Lets start with the packaging. This is perfect packaging what more could you want. All I do is literally squeeze the product onto the mitt, and hey presto. The consistency of this tan is, let me just say, stunning. I know, how can the consistency of a tan be stunning. But it is. It glides onto the skin like a dream. Seriously its like applying silk to your skin, that smooth. This tan does look very dark when developing but once washed off leaves you naturally sun kissed. I personally apply this two night running (I like to sleep in my tan) as I like a darker finish to my tan. This tan would work perfectly for tanning beginners and tanning pros.
Picture: http://www.feelunique.com/p/Garnier-Ambre-Solaire-No-Streaks-Bronzer-Tinted-Self-Tan-Gel-150ml
 3. St Moriz Bronzing Mousse
This is one of the only mousse tan I have ever used. I tend to go for lotion tans just because that is what I am use to. Then not long back I thought right I am gonna come out of my comfort zone and purchase a tanning mousse. I am so glad I did because this product gets 5 stars from me. First off, it is so easy to apply. Grab your mitt, pump it on and apply. Guaranteed streak free tan every time. Don't even get me started on the colour. Perfect colour on application so you can be sure you get everywhere. But the magic starts when you wash it off. Perfect sun kissed skin after every application. Tanning beginner? I highly recommend this, go get yourself a bottle.

Picture: http://www.llymlrs.com/
4. St Tropez In Shower Tanning Lotion
All you lot out there who are fake tan newbies, this one is for you. As you know I love a good fake tanning lotion. I also love a tan that I don't have to spend what feels like 100 years blending it into my skin. In this day and age we are all in a hurry and don't have time to stop and actually do something. So why not have a tan that you apply to damp skin and leave to develop for 3 minutes. Yes that's right I said 3 minutes. All tanning newbies out there you cant go wrong with this tan. Personally, and I will be honest with you, this doesn't give me the dark tan I love. This is gradual tan, so if you desire a darker tan you need to commit to building this up. I may over do it, but I use this every night when I use it. But this does give you a lovely sun kissed look. Which looks like the perfect natural tan. So come on, a perfect natural tan in a bottle, what more are you looking for. 

  
5. No7 Perfectly Bronze Tinted Lotion
Again you beginnings out there, say hello to this one. I am a big fan of No7 and when I saw they done fake tans. I was straight in to Boots and it was in my basket before you could say hey presto. This one gives you a beautiful summer glow. The product is itself as said in the name is a tinted lotion. Which is amazing because you can then see where you have applied it. I love the smell of this product, you can say goodbye to old fake tan smells. The packaging for this is so stunning. Its simple and also has a pump, which if I am honest is a massive bonus in my book. Like I said you beginners out there, get yourselves to Boots, this needs to be on the top of your shopping list.


So they are my top 5 fake tans. Have you tried any of these? Or any different ones you would recommend? Let me know in the comments. Come on summer is coming we need to get our summer glow on. I always find wearing fake tan makes me feel more confident. Some people around you may not agree with it, I know I have people in my life that think I shouldn't wear it. But fake tanning is so much safer than sitting in the sun, and I personally love it. Don't let anyone around you stop you from wearing it. If it makes you feel good, then I say do it.

Love 
Zoe x
Share:

Wednesday, 20 April 2016

What I eat in a day

Hi everyone, 
How are we all? Let me know in the comments.

Today's post is something a little different. I personally love reading these kind of posts and watching them on YouTube. This year I decided to change my way of eating and just my lifestyle in general. I went to Tesco and I purchased Joe Wicks book, Lean in 15. This has truly improved and changed my way of seeing how I eat and exercise. I now find that the food I eat actually fills me up and doesn't leave me feeling hungry. I will be honest, as you see from this post, I don't always eat things that are super healthy. I do still eat them cheeky little snacks. I have based today's post on what I ate on Monday. I have not left any thing out, what you see is literally what I had. 
So lets begin.

Breakfast:
I personally prefer to do my HIIT session in the morning. So my breakfast always contains protein. The breakfast I chose on Monday was Joe Wicks Lean In 15: Winners protein pancakes. These are super scrummy. I normally make these with either vanilla whey protein or chocolate brownie whey protein. They are really quick and easy to make and taste lovely. If you use whey protein, please leave me a comment below with what flavours you like. As I am always looking for new flavours to try.
Lunch:
For lunch I went for Joe Wicks Lean In 15: Joes McLeanie burger. This is incredible. The burger is made from turkey mince and let me just say I had never had turkey mince before I tried this burger. This will definitely be something I enjoy again. I have made this for the whole family before and they loved it. This was just perfect for lunch and I just served it with some sweet potato fries.  


Dinner:
For dinner I cooked as it was a Monday. So I got searching through my cook books, I own about 30. I came across one recipe that I thought yes this is it. So I decided to make Deliciously Ella Everyday: Veggie paella. This was the first time I had made this and OMG it was a winner. I absolutely love this it tasted incredible. 


       Dessert:
We don't always have a dessert but my mum came home from Tesco with a box of Tesco fresh cream Belgian chocolate Ã©clairs. These are super tasty and so naughty. But they are just too good to say no.   
Snacks:
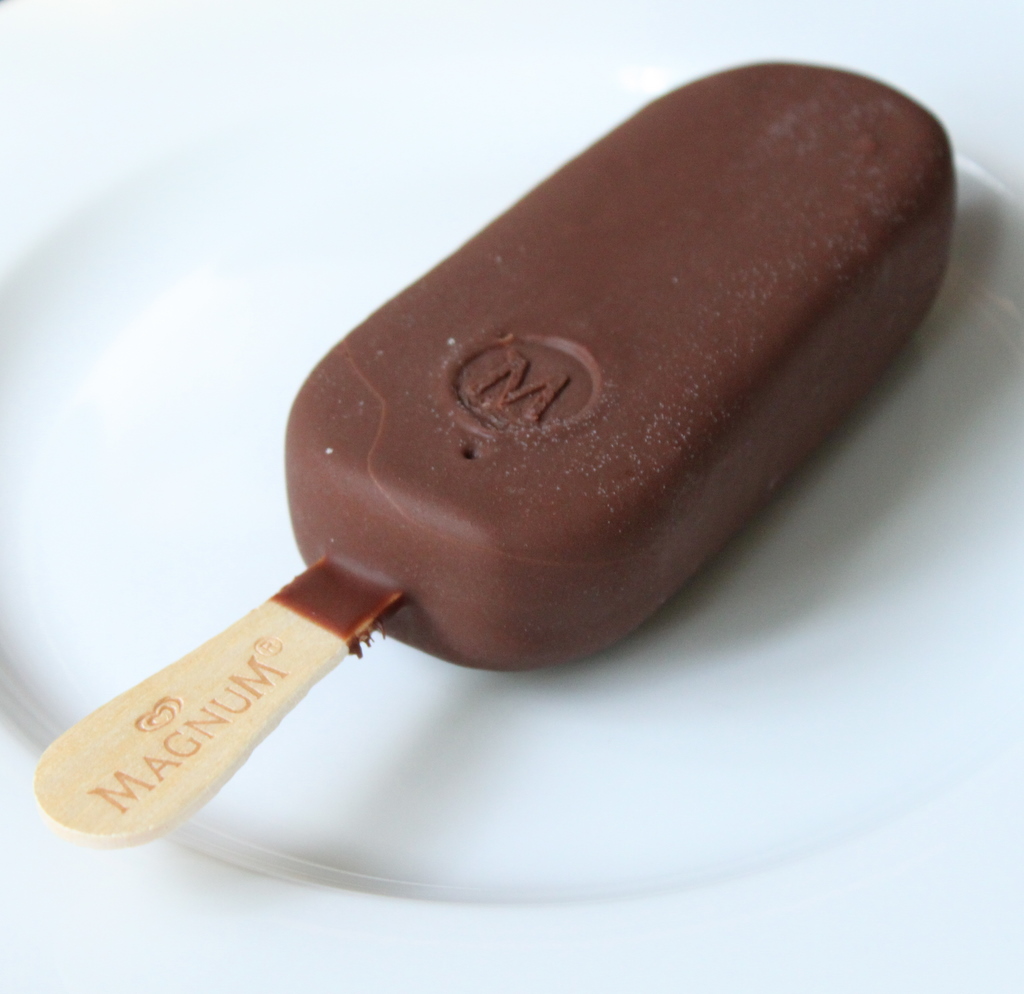
My snacks for the day included an orange, a handful of prunes and a magnum. Again the healthy and the not so healthy. But this is what I have on a normal day minus the magnum. I try to eat plenty of fruit everyday. The magnum was just because it was in the freezer.


Picture: http://itsybitsyfoodies.com/magnum-ice-cream-bars/

Drinks: 
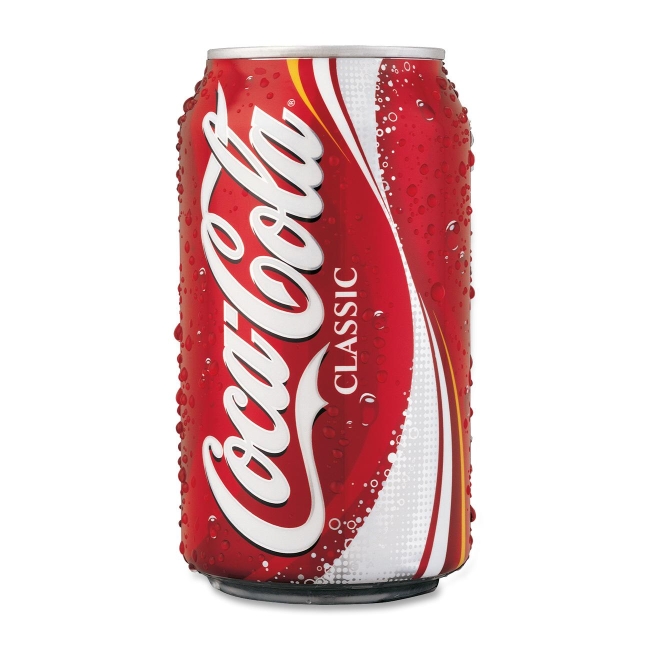
Drinks for me are very basic I basically drink water all day. I just had a can of coke with my tea. 

So there is what I eat on a typical day. You get to see the good and the bad. I hope that you enjoyed this post. What would you normally eat in a day? Let me know in the comments below.
See you soon
Love
Zoe x
Share:

Sunday, 17 April 2016

My top 10 things on my bucket list

Hi everyone,
 
I know what you must be thinking, two posts one day. The only way I can describe this is that I messed up big time. I was planning on getting my Liebster award post out yesterday evening. But when I came home from work my sister had had furniture delivered and was trying to build it. This resulting in me not being able to get in my room as all her stuff was in it. We then decided after everything was done that we were all going out for a meal as it was getting late. I did work on it when I got home but by that time I didn't have enough time to finish. Hence why you have two posts today. So todays second post I have decided to give you my top 10 things on my bucket list. I am a massive believer that everyone should have a bucket list, you need things to aim for. Also I love finding new things to put onto my bucket list you can find them all over the web.

So here we go.

1. Visit Australia. 


Picture: http://www.fanpop.com/clubs/australia/images/3849063/title/bondi-beach-photo
   2. Be happy with my body.

Picture: http://www.intimina.com/en/healthy-body-peaceful-mind.php

3. Live more and worry less.

Picture: https://uk.pinterest.com/pin/367043438354143660/
4. Create a memory box and open it years later.

Picture: https://uk.pinterest.com/pin/372391462909172366/
5. Post a letter on Juliet's house wall.

Picture: http://www.dianewantstowrite.com/2012/01/reel-places-to-see.html
6. See the fairy pools in Scotland.

Picture: http://imgur.com/gallery/xha1H
7. Learn to surf.

Picture: http://www.mrwallpaper.com/Surfing-Girl-wallpaper/
8. Take a picture everyday for the whole year.

Picture: http://maximizesocialbusiness.com/linkedin-photo-advice-what-happened-1934/
9. Visit Anne Franks house.


Picture: http://explorerguidebook.blogspot.co.uk/2014/06/anne-frank-house-amsterdam-belanda.html
10. Put a lock on a love bridge.

Picture: https://peoniesandpancakes.wordpress.com/2013/09/04/the-love-lock-bridge/
So there are just 10 things that are on my bucket list. I really loved writing this post, and I would love to hear what's on your bucket list. Leave me a comment below with 5 things on your bucket list. If you are interested in finding out what else is on my bucket list you can check that out on my pinterest. Click here to check that out.
Till next week.

Love
Zoe x
Share:

OMG, I have been nominated for the liebster award!!!!

Hi everyone,
So something absolutely crazy happened at the beginning of this week. Which you can probably tell from the title of this post. I have been nominated for the Liebster award by the beautiful Samantha Ruth from Lavender and honey. I would just like to say a massive thank you Samantha it was so kind of you. Also thank you to everyone who take the time out of their day to read my blog, I truly appreciate you all.
Picture: http://2ontherun.com/tag/liebster-award/
So I guess some of you are sitting there reading this thinking "what is the Liebster award"?
The Liebster award is an award that only exists on the internet. It is an award that is awarded to bloggers from bloggers. This award is an amazing way to connect with other bloggers in the blogging community. Also it is a great way to promote your blog and other blogs. By participating in this it not only gives you the chance to learn about new blogs, its gives your readers a chance. 
The rules:
To be able to claim your award you need to follow the rules below.
1. Link back to the blogger that nominated you. 
2. List 11 facts about yourself.
3. Answer the 11 questions given to you by the blogger that nominated you.
4. Nominate 11 blogs that have 1000 followers or less.
5. Create 11 questions for your nominees.
6. Notify your nominees, so they can join in the fun.
11 facts about me:
1. I am a qualified hairdresser.
2. I had an eye operation when I was younger.
3. I have an identical twin sister.
4. I am a candle addict.
5. My biggest dream is to visit Australia.
6. I am absolutely addicted to American Horror Story.
7. I am a Neal's Yard Remedies consultant.
8. I am massive lover and believer in fake tan.
9. My hair is naturally mousey brown.
10. I own a Mini One in Pepper White.
11. My weaknesses are cupcakes and expensive home décor.  
My 11 answers:
1. What do you wish for your blog in the next 2 years?
In the next two years I would love to have a good amount of followers who regularly read my blog. Also I wish that I am still uploading consistently, if anything more than now. But most of all I hope that my readers, be there a large group or just a hand full, still enjoying reading my content.
2. What is your favourite thing about blogging?
This is such a hard question. When I sat down to think about this one I had so many things flying around my head. I love everything about blogging. But if I am going to pinpoint a certain thing it would have to be that it gives me the chance to share what I love with people all over the world. Also that I get the chance to speak and get to know people all over the world. This has opened up so many amazing opportunities for me to chat with people all across the world, and for that I cant be more thankful.
3. If you could only shop one brand (clothing) what would it be?
For this one it would definitely have to be Next. I only own a few items of clothing from Next but they are some of my favourite pieces in my wardrobe.
4. Who is your favourite blogger?
Amy from Pamperedprune. Please go check her out, her blog is truly incredible.
5. What is your best blog post? (Link it in your answer)
This would probably be my "My Top 5 Beauty Products" post. Which you can find here.  
6. How have you grown your blog in the past?
In the past I have grown my blog by posting about new blog posts on Twitter, Instagram, Google+ and Pinterest.
7. What was you biggest beauty mistake that you have learned from?
OMG this one would definitely be fake tan. I use to be terrible at applying it, we are talking orange and streaky. I soon learnt how to do it properly when I done tanning at college (I done a hair and beauty studies diploma when I was at high school). Now my tan nearly always looks flawless.
8. Is there anything you would change about your blog? What would it be?
I guess at the moment the only thing I would change is I would love to post more frequently (more than once a week). Also I would love if I could improve my photography skills.
9. Who is your fashion and beauty inspiration?
This would definitely be Julianne Hough. She just is stunning and always looks incredible.
10. What were your new year resolutions for 2016? Have you kept them?
I had quite a few New Years resolutions I wanted to achieve this year. Some of them would be:
- Clean make-up brushes everyday.
- Eat more healthy.
- Drink more water.
- Say "yes" more.
I haven't achieved all of my resolutions yet but by the end of year I hope to have them all done. You can check out all my New Years resolutions here.
11. What was the coolest thing that ever happened to you?
I know this is going to sound sad but definitely my blog. My blog is such a massive thing in my life at the moment, and definitely the coolest thing I have ever had the chance to do. But its all down to my lovely readers, for enjoying reading my posts day in and day out. I love hearing what you guys have to say about it. It truly does make my day when I get a lovely comment or tweet saying that you enjoyed a post.

My 11 nominees:

- Hana Rosella
- Nourish Me
- The mini mermaid
- Enjoying the view 
- The rose quartz 
- Lucy Lifestyle 
- Its livia mae 
- Morning elegance 
- Pamperedprune
- Charlene and Leanne
- Cayless 

11 questions for my nominees:

1. What is your go to beauty product?

2. What made you start blogging?

3. How long have you been blogging for?

4. What is you top tip for people wanting to start blogging?

5. If you were stranded on a desert island. What would be the one thing you would want with you?

6. What is your favourite film?

7. How do you stayed organised when blogging?

8. What is your favourite thing about blogging?

9. What is you favourite food?

10. What is your favourite shop for purchasing beauty products?

11. How do you see your blog in 2 years time?

I would like you say another massive thank you to Samantha for giving me this opportunity. Also thank you for everyone that takes the time out of their day to read my blog. I really enjoyed writing this post and I hope everyone I nominated enjoys writing it too. I now accept the Liebster award.

Love
Zoe x

Share:

Wednesday, 13 April 2016

All about concealers

Hi everyone, 

Today's post is all about concealers. I was recently chatting with my friend Sam from Into The Gloss and their best concealers article, and it got me thinking about writing a post about my thoughts on concealer. I personally love a good concealer. I suffer with acne and lets face it, concealer is a lifesaver. I know what you must be thinking, "come on Zoe a concealer is so basic, what's there left to know". But there is so many mistakes people make with it, you would not believe me. This ranges from the actually purchasing the product to the application. I know this post wont be for everyone but I hope if you do stick around and give it a read you will learn something new. So what I am planning on talking about today is two major points when purchasing a concealer and once you have purchased it. These are Choosing a shade and Technique of application. So lets get on with it.

Choosing a shade:

Now this is that daunting stage when you are in the shop looking at all the concealers. They are all claiming amazing benefits but all look the same. You then find that dream concealer you want to try and it looks perfect. It says everything you want to hear. Next you look closer and all these names of shades/colours are springing out at you. This is that exact moment where panic sets in. Your mind goes into overdrive. Are you light? Are you tanned? Are you in-between? If you are what shade even is that? Wait does that say warm, cool or neutral? What even does this mean? These are just some of the questions that have filled your mind. Causing you to go from confident about this product to out of your depth.


First off before you start cementing your face in different coloured swatches of concealer. Yes I bet we have all been there. Take a minute to breath. Picking the right shade is vital but taking that into consideration you need to work out your basics first. 

Two things we must consider when picking out that perfect concealer is complexion and skin tone. I know what you are thinking, "she really expects us to know this". So lets take it slowly.
Lets start with complexion. This is if you have a light, medium, tan or dark skin. I know this one is hard to decide but really think about it. I personally am light. I still use the same concealer even if I have tanned as I still find it works best for me. If you are very fair skinned but tan I advise you would stick to more of your natural skin colour. As you may find just going up to a medium can make a worlds of difference. The last thing you want is to see you concealer shining through you foundation. When deciding what your complexion is my one tip is be realistic. Don't go for the shade you "think" you are, go for the shade you really know you are.
So next up is skin tone, this one may be a bit trickier. When we talk about skin tone we are talking about the undertones to your skin. The different types of undertones you can have are as followed:
Cool: Pink, red, blue undertones
Warm: Yellow, golden undertones
Neutral: Mix of both cool and warm 
From what I have said above you now need to decide what you think your undertones are of your skin. My skin personally is pink in some places and yellow mostly over the rest. This puts me with a Neutral skin tone. Which is what I use in terms of concealer shades.
Now when it comes to trying shades of concealer on some brands they may specify if they are certain tones. If they don't you may need to try all the ones for your complexion and see what suits you best. When you are testing out concealers I can not stress enough that they should be tested on your jawline. Please never test a concealer on the back of your hand. If you do a little test here and put your hand up to your face when you are wearing no makeup. My guess is its not the same colour.
If you are still struggling to decide what colour is best go to a makeup counter. They are always more than happy to help and will match you up perfectly.
Saying what I have just said you can purchased concealers lighter than you need and darker. As these make excellent products for contouring and highlighting. Using concealer to contour and highlight is great for a night out as this will have more staying power than using a powder. Just make sure you set it in place. Also don't over do it, there is a fine line between it looking good and it being done to a poor standard. You don't want zebra strips on a night out.

Morphe concealer palette 
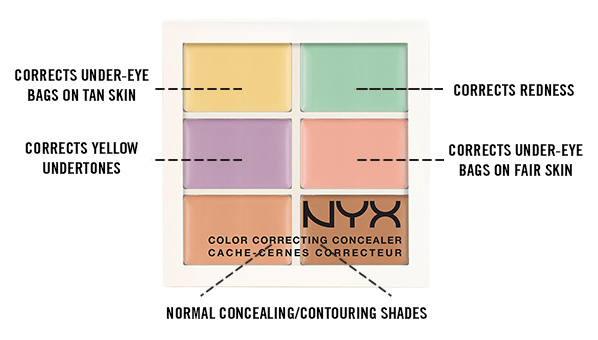
 Another type of concealer you can purchase is coloured concealers. These all work to separate concerns that you may have. Below are the colours you can purchase and their concerns.
Green: Redness
Purple: Yellow tone
Pink: Under eye bags on fair skin
Yellow: Under eye bags on tan skin
Picture: http://www.shefinds.com/2015/a-beginners-guide-to-color-correcting-concealer-how-to-use-each-shade/
Technique of application:
So now we are on to the techniques we can use to apply a concealer. There are so many ways to do this from simply using your fingers to using a brush and blending out with a sponge.
I personally like to apply using a flat concealer brush and then either blending out with a pointed foundation brush or a fluffy brush. I do this just because I think this is how I can achieve my best look. You may find that this doesn't work for you, its all about trying things out. Like for instance I have never used a sponge to blend out my concealer, this is because I have never owned one. So I cant give my opinion on this but is a massive popular tool to use to blend. Below I am going to list some of the ways you can apply your concealer.
 Fingers: Apply and blend with your fingers. This is quick, easy and gets the job done.
Brush blended using fingers: You get more precision applying with the brush but if you are still in a hurry just blend out using your fingers. It does the job every time.
Brush and blend out with a brush: This is for the person with a bit more time to spare.
Brush and blend using a sponge: Again this one is for the person who wants to take their time. Or is apply a heavier concealer.

The brushes I use: Morphe large flat concealer brush, Real Techniques deluxe crease brush, Morphe pointed foundation brush, Real Techniques expert face brush  
When it comes to concealers you will find you can purchase thicker and runnier ones. A thicker concealer is fantastic for covering up those blemishes as they are higher coverage. Whereas the more liquid concealers are great for smaller imperfections and under the eyes. As it doesn't sit so heavy on the skin.
If you are planning on using a concealer as a highlight or contour there are rules to follow as to where you place it. Like I said earlier you don't want the zebra on a night out look, you want it to look to a high standard. If you look at the picture below it shows the good place to use your lighter and darker shades. Once you have put in all your lines all that is left to do is blend it all out.
Picture: http://fabfashionfix.com/beauty-how-to-highlight-and-contour-your-face-with-makeup-like-a-pro/
I personally apply my concealer under my foundation, but it is up to you which way you do it. I just finds this works best for me and then if I have to add a bit more after foundation I do.
So that's everything about concealers I have to tell you. If you liked this post please leave me a comment letting me know. I am sorry it was such a long one, I just wanted to get everything in. If you know anything about concealers that I didn't mention leave it in the comments I would love to hear. Also if you liked this post I would love if you went over to Into The Gloss  and checked out their post called The Best Concealers. It is well worth a read. Now you know all the tips and tricks for picking and applying your concealers. You might as well learn what concealers are the best.
I hope you all have an incredible week. Keep your eyes peeled there will be more blog posts this week to come.
Love
Zoe x 

Share:

Sunday, 10 April 2016

At home pedicure routine

Hi everyone,
I am so excited to write todays post. I am a massive lover of a pamper night. May this be anything from a bubbly bath with candles to a facial or pedicure. I personally am on my feet all day being a hairdresser. So I do find that I suffer with my feet badly. This can range from the fact that I get blisters so easily you would not believe it. To the fact that my feet can get so sore, it gets to the point where I can barely stand on them. So I have to keep up with regular pedicures. As much as I would love to sit down and leave it all down to my incredibly amazing beauty therapist, this just isn't an option. So my alternative is to do at home pedicures and these work so well for me. Also for the fact that I have tried about a million foot products does not help. But I truly believe everyone should find time to have a bit of me time. Be this a bubbly bath or facial or pedicure, it really doesn't matter.
So I thought I would share with you my steps to the perfect pedicure. I will also be mentioning products that I love. All opinions are mine. So lets get on with it.
Step 1: Soak
For this step you need to fill your foot spa with warm water and add your foot soak to it. Then put your foot spa on the right setting that you want and sit back and relax. I usually soak my feet for about 15 minutes but it is up to you how long you do this step for. I personally love this step it has to be my favourite one. This is the perfect time to sit back and have a read of your book or flick through a magazine. I love doing this as it gives me a chance to get off my phone, which always seems to be glued to my hand.
Products I love using for this step are the Visiq bubble foot spa and The Body Shop Peppermint reviving foot soak.


Step 2: Scrub
Once you have soaked your feet for your desired time, its time to give them a scrub. This is really good to remove any dead skin cells and helps to soften the feet. When using a scrub make sure you use it everywhere but focus on the areas you find the driest. I love using a scrub on my feet as it leaves you with that soft spa like feel after your pedicure.


Step 3: File
Once you have washed all your scrub off with water give your feet a very good dry with a clean towel. Next up is to give your feet a file using a foot file. For this you need to focus on where you get dry skin/patches. For example good place to file are your heel, your big toe, below your toes and to the side of your foot. If you suffer with bad dry skin you will be able to see the flakes of skin coming off, you may need to hover after. If you don't suffer with dry skin this wont be as noticeable.


Step 4: Cut and file nails
This one is just as important as any other step. What would the point be of having amazingly soft pedicured feet to then look at you toe nails and they be in a poor state.  This step does not need to be done every time depending on how often you do a pedicure. I personally do one every week. I can't stress enough how important it is to keep your toe nails in immaculate condition, especially with summer coming soon.
For this step I love using a curved nail file and my QVS nail clippers. I purchased these clippers from Tesco but any will do.

Step 5: Paint nails with favourite gel polish
I know not everyone owns gel polish but you can use normal nail polish. If you do this I advise you either make sure they are completely dry before continuing or apply your colour at the end. Just wipe over the nail with polish remover before you apply it to remove any excess product on the nail. I love using gel polish as then I know it will last me a good few weeks. Also it is dry there and then so you can just carry on and not worry about waiting for them to dry.
I personally am in love with the IBD Just gel polish.


Step 6: Foot cooling spray
This step I have to admit is just for pure satisfaction. This is not a necessary step but is perfect to add in. It gives that little bit extra spa feel to an at home pedicure.


Step 7: Leg and foot massage
This one again is just for pure luxury. But think about it you have been on you feet all and your legs feel tired. This is what you need. I totally understand a massage done by yourself is not as amazing as when someone else does it for you. So why not do your pedicure with a friend and then can do each others or include your partners in this step. I am sure they wont mind helping. Either way if you have a helping hand or do it yourself, this is a step that mustn't be missed. Trust me. 
A product I use for this is The Body Shop Peppermint reviving leg gel.


Step 8: Foot cream
Again this is a step I absolutely love. There is nothing more satisfying than applying a ton of foot cream after a pedicure. Knowing you are going to wake up with the softest feet ever.


Step 9: Put on socks
This step sounds like no big deal, but it is. After all your hard work pampering your feet you need to hold in that moisture you have added. So pop your socks on.


So there are my steps to what I believe is a perfect pedicure. Have you tried any products that I have mentioned? Have you got any products you would recommend to me to try? Do you do at home pedicures? If so are yours different to mine? Let me know in the comments. I hope you all have a wonderful week.

Love
Zoe x
Share:
© A Norfolk Blondie | All rights reserved.
Blog Layout Created by pipdig